Friday 2 September 2016

How to process a chicken for meat

Please note this post will contain graphic images of a chicken being humanely killed and processed for human consumption. If you do not wish to see these, please do not continue and find another page more to your liking. Fair warning.

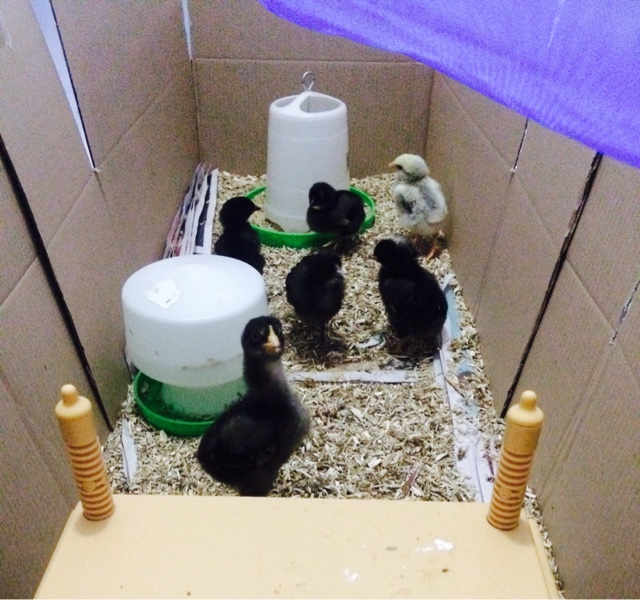
Back in May we bought six, week old chicks from a local guy who hatched a few too many for his needs. They were a barnyard mix of Plymouth Rock, Sussex, and Wyandotte, and sold unsexed so I knew that at one point a rooster cull would be most likely. 

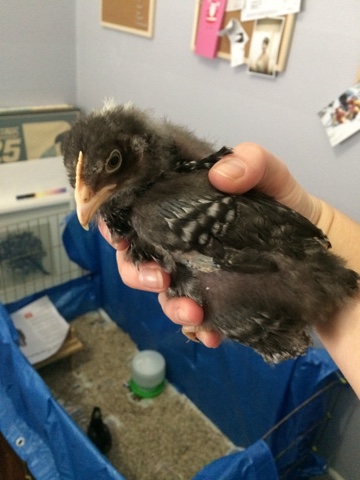
The chick in the foreground not at all camera shy is the rooster I have just finished processing.
A few weeks old at that time and already looking suspiciously rooster-like. 
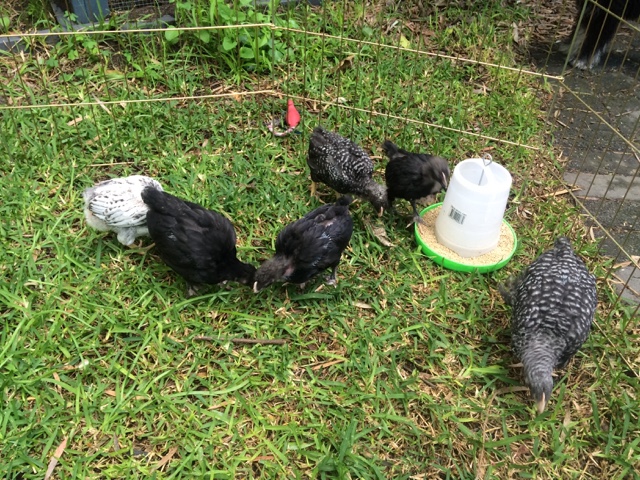
Once they got fully feathered out we started letting them go outside during the day to get used to the other chickens in the run but not actually interact with them until they were a bit bigger. Then they moved full time into the big coop house, with the two older girls pretty much ignoring them. I have to say that I have been pleasantly surprised at how well the two older girls took to having six new chicks invade their house and run, with no fights and only the occasional squabble over food since their arrival. 
The new chicks got BIG, quickly dwarfing the two original auracanas who still have no issues bossing them about. 

Then I heard it. On Thursday morning at 6am on the dot I heard what sounded like a mixture of a dog howl and parrot squawk and I knew it could only be one thing. One of the boys was trying to crow. I quickly went outside with a torch to discover who was the guilty party, and mid crow yanked the door open to discover it was the big Plymouth Rock. At about 15 weeks old, it wasn't unexpected.

My hand had been forced and now it was time to do the deed before he really got going and annoyed all our neighbours with his early morning vocals. 
I have to give credit to the website of backyard chickens who have an excellent step by step guide on how to do everything start to finish that I used. You can find the link to it here: www.backyardchickens.com/a/how-to-process-a-chicken-at-home

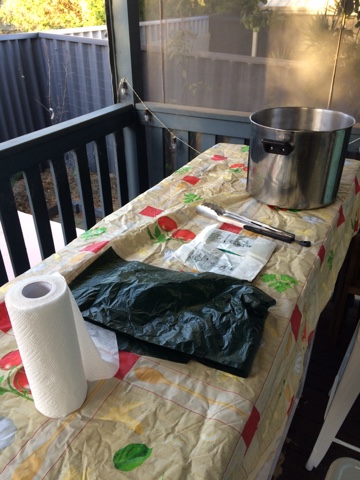
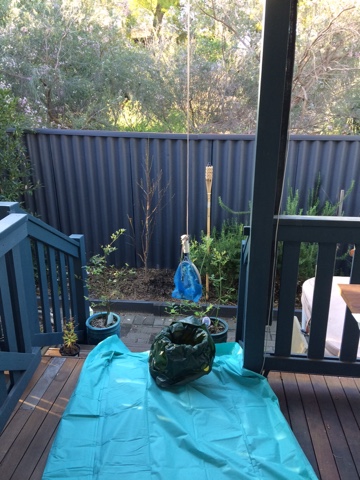
I gathered all my supplies:
Rope
Drop cloths
Garbage bags
Bucket
Rubber gloves
Tongs
Sharpest knife available
Largest pot you have filled with water at 145F
Cutting board
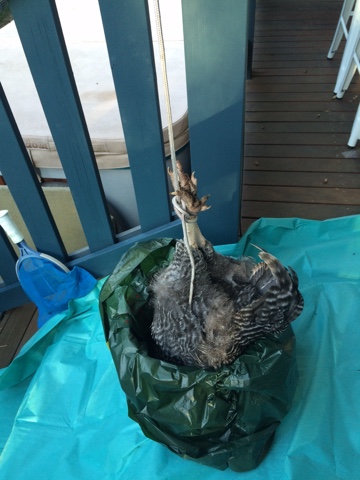
I had removed the food from the run in the morning prior to culling that afternoon, which also made collecting the rooster much easier, as they were so busy eating he was easy to pick up and remove from the run without any stress or squawking. This is the noose style setup I used to hang the bird by its feet which left me two hands to quickly cut its throat. Pool skimmer just to show you how it worked.
I have to admit that the next bit for me was the hardest. It's not easy killing any animal ever, especially one you have raised since a baby, so I didn't relish the prospect and was nervous about getting it right. Once I had him hanging by his feet he very quickly became calm as the blood rushed to his head, so it was now or never, and with one hand pulled his skin taught around his neck, and with the other cut his throat directly under his jawbone. He bled out quickly and without any signs of distress or pain, which was a comfort and I know he did not suffer. I let him hang in the bucket for a few minutes to let all the blood drain out, then washed him off with the hose ready for scalding.

Please note is is where the actual pictures of chicken culling begin. If you aren't up for it please turn back now, last warning. 
Blood draining prior to scalding to aid in feather removal. 
I then placed him in the biggest pot I had for about 30-60 seconds to make the feathers easy to pull. I think I might have left him in for a little too long as later his skin looked a little "cooked" but I'm still learning so we'll see once he's slow cooked up. 
Mid plucking, the feathers came out very easily, and although he was a smallish bird once all the feathers were gone I'm still looking forward to trying home grown and processed meat for the first time ever. 
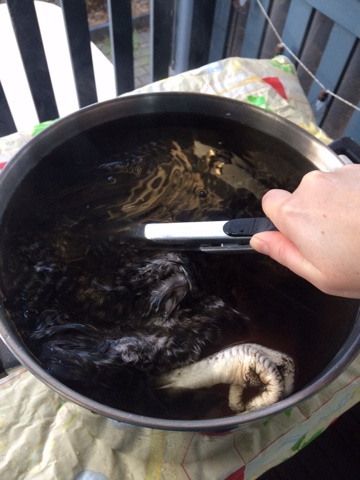
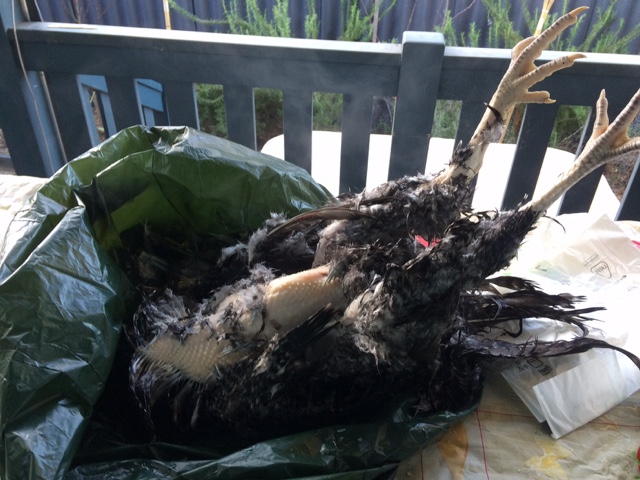
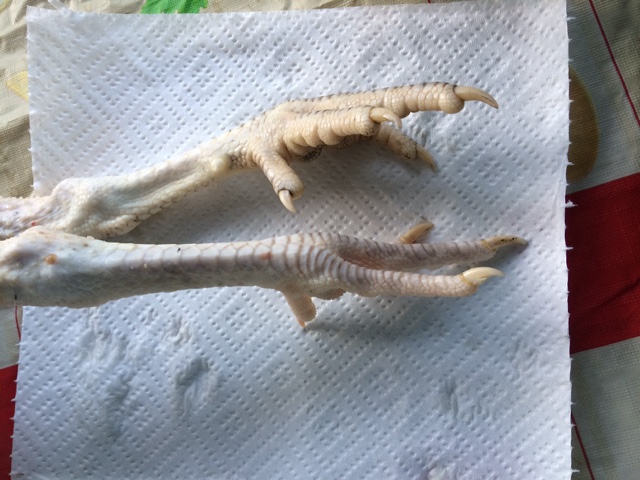
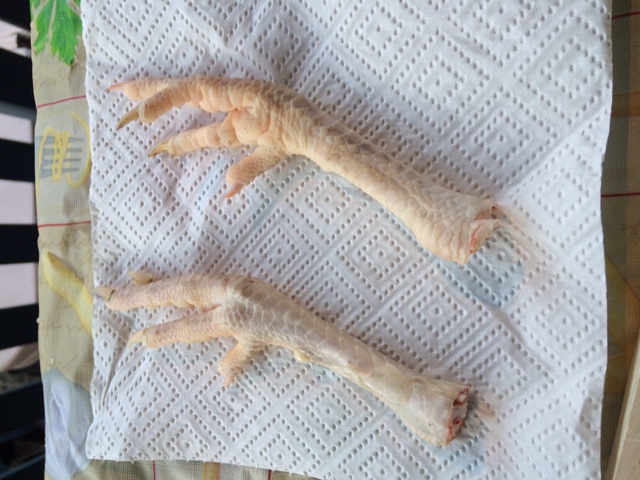
I took off the scaly outer coating on the feet, bottom one having been done, the top still to be done, I will keep the feet in the freezer to make stock with.
Feet for stock.
Splotchy 'cooked' looking skin, I'm guessing from being submerged in the water bath too long. We'll see if it affects the flavour of the final product, but looking more like the chicken you buy in store now.
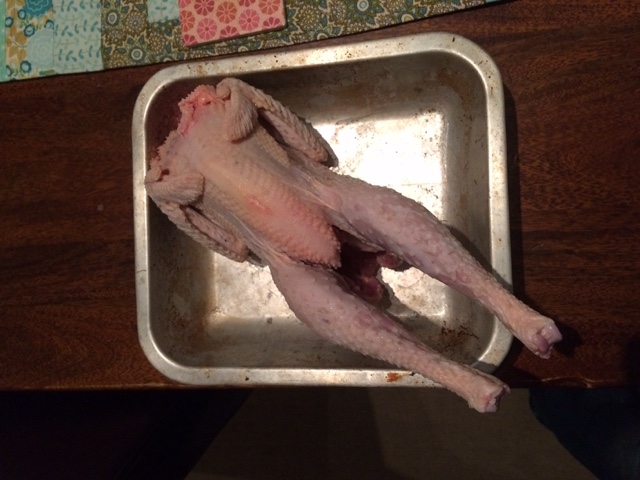
I was too busy/too messy to take any photos of the actual process of removing the head and internal organs, but needless to say, not particularly pleasant jobs, but I was proud of myself at the end for having done everything from start to finish on my own and had a reasonable looking final product.
The very end. Once cleaned out he weighed in at 1.7 pounds, so smallish but I'm hoping tasty. I plan on slow cooking him on Sunday and will update you on how he tastes in comparison to store bought meat. If anything, doing this has made me more aware of just where our store bought meat comes from, and I plan on trying to reduce my consumption of store bought meat and focus more on vegetarian dishes, with meat filling a special, not expected role on the dinner table at our house from now on. 
Hope you got something out of my first time processing one of our chickens, and thanks for reading!

Sunday 5 July 2015

Verge Orchard

With our limited space constraints (our block is around 427 square meters) came certain drawbacks in terms of self sustainability. One is the lack of space available for planting fruit trees as they tend to grow large and take up a decent amount of space. I have jam packed our backyard with different varieties of dwarf, semi dwarf, and columnar fruit species, but some women buy shoes, I buy fruit trees. So eventually I ran out of space entirely in our backyard, but still had a beautiful weeping mulberry tree needing a home, and a fig and orange tree needing relocating as I accidentally planted them in possibly the shadiest spots in our back yard and they were less than impressed with my efforts.
So last weekend we were lucky enough to get the Transition Town Guildford Verge Gardening Group together round at ours to help us plant the trees onto our rather large verge that currently just grows useless weeds in winter and is a dry scorched wasteland in summer. Over the course of two hours we managed to dig all three holes, amend the soil and plant all three trees.
Since then they have gotten plenty of rain, and are all looking very happy with their new homes. In future I plan on extending out and adding some more veggie garden space around the fruit trees and mulching the rest of the verge to eliminate the need of mowing and to also increase the space available for us to continue producing out own fruit and veggies. Enjoy of the photos of the process and the lovely end result, prettiest verge on the street now.
Weeping mulberry tree before transplant
Mulberry tree located on the verge
Everyone hard at work planting the trees

Transition Town Guildford Verge Gardening Group very proud of their handy work

Tuesday 28 April 2015

Curing your own olives

I love the fall. Signs of the cooler weather to come abound with the leaves changing colour, the winter vegetable seedlings starting to sprout and the last of the summer crops are eaten.

One of our autumn crops we started processing was the first of our olive harvest. One of the branches from our tree was hanging low over our neighbours driveway, so we pruned this off and harvested the olives. The recipe I use to cure my olives you can find here. I have found it produces excellent results, and is simple to use. We use a 30 litre barrel used in home brew to soak our olives in, and I leave my olives in the salt brine for around six months, changing the brine roughly monthly. I then soak them in fresh water for a week to remove excess salt, and bottle with herbs and spices along with a the new brine solution of salt and vinegar in sterilized jars. The spices I have used in the past include: whole peppercorns, whole garlic cloves (peeled), bay leaves, dried oregano, thyme, chilli flakes, and rosemary. I found this combination of herbs produces a lovely aromatic olive great for all different sorts of cooking or just eaten raw as a starter. I've also played around with adding different flavours to the olives, such as tequilla and lime zest, and an extra hot and spicy jar requested by a friend by adding a few extra tablespoons of dried chilli flakes. (He said they were good and hot!) The point is, use what herbs you like, and feel free to experiment with different flavours. Maybe try an asian inspired brine, using garlic, ginger, chilli, and maybe some karrif lime. The possibilities are endless! I first add the spices to the hot sterilised jars, then pack the jars tightly with the olives, ladle over the new salt and vinegar brine, and cover with olive oil. There should be enough oil on top to completely cover all the olives and keep them from oxidizing. Then I keep them in a cool dark cupboard or the fridge.
Hopefully you'll get inspired and maybe even plant an olive tree in your own back yard and will get to experience the joy of home grown, cured and delicious olives.
Olives curing in barrel

The rest of the olive tree that remains to be picked

Olives turning from green to black

30L barrel full of olives and brining

Monday 2 March 2015

Recycled Raised Garden Bed

Sadly one of our raised garden beds out the front got eaten by ants so needed to be replaced, so Dave and I decided it was time to build ourselves a replacement bed, one that would last a bit longer than the one on the out! I should mention that the beds that got eaten weren't the ones we built when my folks came down in 2012, but one I bought online that claimed to be 'long lasting and pest resistant'. Yeah right. I have learned my lesson and from now will be making all my raised beds myself! (All the beds that were made by us are looking just fine by the way).
All the materials used for the making of the new bed were either scavenged from under our house from previous owners, and the colourbond steel gotten from a company that sell off cuts or slightly damaged pieces that might otherwise be destined for landfill.
First we had to cut all the scavenged timber down to the lengths we were needing, and then screwed all the pieces into a frame that would become the bottom of the bed.
 
We used jarrah decking boards from our endless lumbar yard under the house to become the corner bits, which hide the raw edges of the colourbond and also gives the frame extra stability. Dave hard at work staining the jarrah to make them extra pretty and long wearing.
Top and bottom of frame assembled ready for painting and cutting of the colourbond sheeting.
Difference before and after oiling the jarrah decking boards that we used for the top capping.

 Securing the colourbond sheets to the wooden frame.

 Closeup of the jarrah corner pieces that hide the colourbond edges.
 Angle grinding the bit of colourbond that stuck up a little too high over the frame on top.
 Almost finished!
 Where the old garden bed was located, after the old bed was ripped out. Looked a bit grave-like I thought.
 Bed placed and leveled, which took way longer than either of us expected, but being the perfectionists we are, got it pretty good in the end.
 Top jarrah capping finished, and bed completed!
Family selfie. :)

Tuesday 30 September 2014

An Unexpected Harvest

With spring well underway, I thought I should get back in the garden and get things ready for my summer crops. To start with I had to weed out one of the beds left empty over winter after adding some compost to improve the soil and be ready for summer plantings. Apparently the compost must have had some of my potatoes that went a bit squishy in the cupboard and chucked in composter, as when I started weeding, up pulled a big handful of potatoes! In the end we got a whole basket full of new potatoes, ranging in size from the palm of my hand down to little tiny round ones (which taste the best anyway) and ended up having them and a bunch of snow peas from the garden with dinner. Best weeding I've ever done!

 We also have quite an abundance of eggs at the moment, so on the dinner menu for tonight is a homemade gluten free quiche with garden vegetables. I'll post some pictures of how it turns out tonight. Anyone have any suggestions as to what they do with an abundant supply of eggs? We're running out of ideas!
 This is the plan for our gardens this summer, now I just need to make it a reality!Just got home from picking up some organic heirloom tomato seedlings, and a bunch of different heirloom seeds to plant out this summer.
 
Well that's about it for now, just a quick post this time round. :)

Friday 5 September 2014

Spring has sprung

With the days getting longer and the air getting warmer, the whole garden seems to be growing faster everyday.
I've managed to squeeze in a few more fruit trees around the back of the house over the winter, with two types of pear, (Nashi and Bartlett), and a dwarf apricot for Dave. These are now starting to bloom with the anticipation of our first years production of home grown peaches, nectarines and pears, not to mention apples, cherries (hopefully!), lemons, and olives.
With this in mind I thought I would share some photos from around the gardens on how the winter veggies are faring and how the fruit trees are starting to come into flower.

Enjoy! :)

Front Veggie Beds:

Peas then (mid July)
Peas now (early September)

Cabbage then
Cabbage now
Garlic, onions and leek then
Garlic, onions and leek now
Fruit trees:
Columnar peach tree in flower. This type of peach tree is great for us as it naturally grows skinny and straight up, which means I can fit more around it.

Dwarf peach tree given to us as an engagement present :) Still grows full sized peaches believe it or not!

Apricot tree planted this winter for Dave. Just started to flower which is exciting as I managed to kill his last apricot somehow.

Nashi pear I planted recently just for me! Dave hates them but I think he's crazy, they are so delicious!

Barlett pear tree, no flowers yet but I did just plant it about two weeks ago, so we shall see!


I'm a notoriously horrible flower gardener, I seem to kill anything not is not a vegetable or a fruit, but I thought I should try and attract some bees and other beneficial insects into the garden so should get my act together and replant the front flower patch which had died off over winter. Not quite finished but looking much better I think. :)